80. I knit a lot of sweaters.

If you didn’t already know it, I am addicted to knitting sweaters.

I recently finished knitting the “Portage” cardigan by Melissa Schaschwary.  No photos yet, because I have to fix the pockets.  I seamed them before blocking and now they look weird.  C’est la vie.  I can’t wait to show you the final product, though, because other than the pockets, it’s a glorious sweater!

I’m currently working on two additional sweaters: “White Pine” by Amy Christoffers and “Cozy Neighborhood” by Joji Locatelli.  Both are gorgeous sweaters that I can’t wait to finish (and wear), especially Cozy because I used such pretty yarn.  Here’s a sneak peak (I’m further along now):

The Craft Queen

I’m using Malabrigo Arroyo yarn in the color “Glitter”.  The name is a bit confusing, because I’m not really sure how that corresponds to a colorway consisting of shades of brown.  Either way it’s super pretty!

If you don’t think I’m crazy already, I’m itching to start another sweater: Demi by Kim Hargreaves.  I’ve had the book in which it’s printed (Rowan Vintage Knits) for at least a few years, and I finally went ahead and bought the perfect yarn for this project: Plymouth Encore Tweed in the color “Grape Jam”.

The Craft Queen

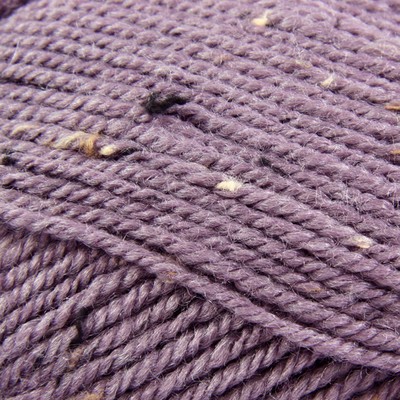
Photo credit: yarn.com

Purple-y goodness, yes?  I’m especially excited for this sweater, the number one reason being this yarn is machine wash AND dry.  Scoreeeeeee.

So, what’s on your needles at the moment?

XO,
Gabriella

Remember to follow me to see all my latest posts, and don’t forget to share me with your friends!

Affiliate link:Interweave Store

79. Before and After: Tiered Shelf

Guess what? I turned that trash shelf into something gorgeous!

I think this might be one the quickest furniture makeovers I’ve ever done.  There are still things sitting finished in my apartment that I haven’t written about yet, but this one I got done in record time AND actually took proper before and after photos.  I’m patting myself on the back right now, you should see it.  I look pretty ridiculous.

Let’s start off with the before shots:

tieredshelfbefore

Meh.

Definitely not in the best condition, but definitely not awful.  It just needed some tender loving care!

I started off by lightly sanding to the whole thing and giving it two coats of Behr Premium Plus paint in the shade “Mountain Pine”.

fc464678-df1d-496e-bbc4-5c84bf7b5680_400

Image credit: thehomedepot.com

I really like this color.  It’s even prettier in person!  Just wait.

After the second coat of paint (which I let dry for ~24 hours), I distressed all the edges by sanding with a light grade sand paper.  Super easy.

tieredshelfcloseup

After that, I decided that the finished piece would need a little more pizzazz, something to make it look more expensive…or at least like I did something else to it besides slap on a coat of paint.  The solution I came up with: stamped aluminum sheets.  These are sold in the building supply aisle of hardware stores; I got mine at Home Depot (exact here).

591f44ba-af7e-4b0c-a76b-6fdf2d933896_1000

I measured the inside portion of all the shelves and cut out the appropriate size from the larger sheet using tin snips.  A word of caution: Definitely wear gloves and eye protection when cutting!  I tore up my fingers in the process and am still wearing bandages. :/

After I had the sheets cut out to the sizes I wanted, I used contact cement (exact here) to adhere the sheeting to the inside of the shelves.  I chose to close off three sides, but doing just two sides or just the back would also be a great choice!  This stuff works really well, but it is SMELLY.  Definitely use this stuff outside if possible, or at least somewhere you can open a ton of windows.  It’s fairly simple to use: paint both surfaces you want to stick together, let the stuff dry until it gets “glossy” (i.e. shiny), and then press the two surfaces together.  The only downside is you can’t really readjust once you put the surfaces together, so try to be as precise as possible!

The finished product, which I absolutely adore:

IMG_0065

tieredshelfafter

tieredshelfafter_closeup1

IMG_0070

So, what do you think?  Did I do the piece justice?!  I honestly think it’s super cute.  I was going to sell it, but I’ve decided to keep it instead.  What the crap…I’m turning into a hoarder.

beforeaftershelf

Thanks for reading, check back soon for more transformations!

XO,
Gabriella

Remember to follow me to see all my latest posts, and don’t forget to share me with your friends!

Affiliate link:Shop Our Holiday Hub - Elevate your Gifting - Up to 70% Off

78. Knitting: New Girl Skirt

My latest finished knitting project is New Girl, a skirt pattern by Allyson Dykhuizen.  The pattern is very well written, although I did make a mod.  I didn’t want to have to sew the waistband shut and thread the elastic through at the end, so I just picked up the cast-on row when the waistband was finished (closing in the elastic as I went).  I’ll admit this made knitting the increases for the body of the skirt a bit awkward, but I would still do it the same way if I were to knit this again.

I will say that all of that straight knitting was a bit boring, but I do like the finished product.  The daisy stitch at the bottom of the skirt also made my hands hurt, which doesn’t happen to me too often.  I had to take frequent breaks.

fullskirt

I finished this skirt a little while ago, but I didn’t get around to blocking in until last week.  I finally wore it today!  I really love how it turned out, don’t you?

FullSizeRender

FYI: The yarn I used is Quince & Co. Chickadee in the colors “Honey” and “Peacock”.  I knit the smallest size and used about 3.75 skeins of Honey and 1.5 skeins of Peacock.

I’ve got a few more finished knits that I’ll be sharing with you within the next few days, so stay tuned!

XO,
Gabriella

Remember to follow me to see all my latest posts, and don’t forget to share me with your friends!

Affiliate link:Interweave Store

77. Whoops.

Life caught up with me, and I [obviously] haven’t written anything in a longgggg time.  My bad.

Anyway, my new job is going really well.  I’m having a blast, actually!  Now that I’m back in the swing of things and used to my new schedule, I can get back to doing all kinds of fun projects.  The newest one?  A gorgeous tall shelf that I pulled out of my neighbor’s garbage.  That’s right folks: Yours truly has now become a trash picker!  In my defense, this shelf is still in great condition.

Free shelf? Worddddd.

Free shelf? Worddddd.

See!  Why on earth would you just put this to the curb?!  There are a few minor nicks and a water mark or two, but other than that, there’s really nothing wrong with it.  If it were me, I would have at least dropped this off at Goodwill so someone else could maybe get some use out of it.  I’ll never understand why people insist on being so wasteful.

I already have big plans for this baby, but you’ll just to have wait and find out what they are when I post about the finished product. 😉

I also plan to write about more than just my DIY projects.  I’ve got too many interests…I’m excited about them all and want to share them with you!  I know it’s considered a “no-no” in the blogiverse to write about more than one topic/theme, but honestly…IDGAF.  It’s my life, and my blog, and I can write about whatever I want, yo!  If I wear a cute outfit, I’ll write about it.  If I redo a piece of furniture, I’ll write about it.  If I played an awesome show with my band…you guessed it, I’ll write about it.  All of those things are part of my life and my persona, so of course I would mention them!

you_have_a_blog

Okay, rant over.

Have a lovely evening, kittens!

XO,
Gabriella

Remember to follow me to see all my latest posts, and don’t forget to share me with your friends!

Affiliate link:Shop Our Holiday Hub - Elevate your Gifting - Up to 70% Off