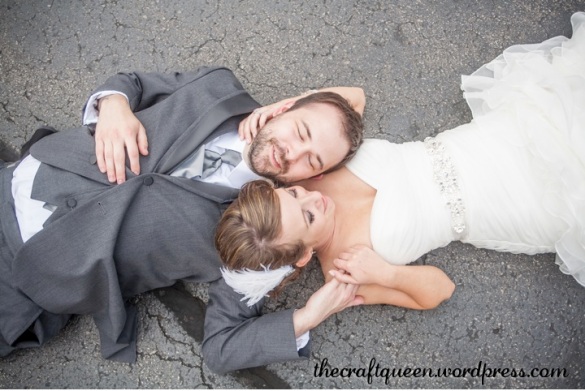
Yay, it’s time to show you another one of the projects from our [almost] completely DIY wedding! Today’s tutorial will highlight my DIY bridal sash.
I can’t even tell you how much time I spent scouring the internet for wedding related paraphernalia. Let’s just say if I got paid for that time, our wedding would probably have been paid for…yikes. A small portion of that time involved perusing Etsy shops in the hopes of finding the perfect bridal sash. When I saw the prices, I about lost it.

Jolie Crystal Bridal Sash, $275
Source: KirstenKuehnDesigns
$275? TWOHUNDREDSEVENTYFIVEDOLLARS?! Listen, I get that it takes time to make these things, and that materials cost money. I totally get that. I have my own Etsy shop, I understand. However, there comes a point where I think things just start to get outrageous. This might seem like a mere pittance to some, but I only paid a little over $600 for my wedding gown…paying half that for a damn sash just seemed superfluous.
Obviously, I weaseled my way out of paying hundreds of dollars for a sash by just making one myself. Here’s how you can make one, too!
DIY Bridal Sash
Materials:
– rhinestone applique of your choice, i.e. blingbling
– 3 yards double face satin ribbon in desired width (mine was 1.5″ wide)
– E6000 glue
– small paintbrush
– paper plate
– scissors
– pencil
1. Start by folding the ribbon in half to find the center. Make a small mark with the pencil; this will help with placement of your applique. I bought my ribbon from Ribbons and Bows Oh My, 5 yards for only $2.
2. Squeeze a small amount of E6000 glue onto the paper plate. Using the paintbrush, apply a thin layer of the glue to the back of your applique. If part of the applique will hang over the edge of the ribbon, make sure to leave those areas alone! Here is the applique I chose:

Brava Long Rhinestone Ornament, $59
Source: shinetrim.com
(Why yes, I do realize I picked on of the most expensive pieces that ShineTrim carries, but I really NEEDED this much bling. I swear.)
3. CAREFULLY apply the applique to the ribbon, matching the center of the applique with the pencil mark indicating the center of the ribbon. Allow glue to dry.
4. Cut the ends of the ribbon on an angle.
And that’s it, folks! That’s how simple it is to make your own sash for your wedding day…or when you just want to be all fancy schmancy.

Me with some of my high school home girls…they traveled all the way from NJ to attend our wedding in Milwaukee! I can’t believe it’s been 10 years since we graduated. Also…did you see the awesome peacock colors going on in this photo?!
And of course, for pinning purposes:
It’s been over a year since we tied the knot, and I have quite a number of DIY projects I still need to show you. I guess I better get going on those before they get too stale! 😉
XO,
Gabriella
Remember to follow me to see all my latest posts, and don’t forget to share me with your friends!


Pingback: Make These 6 DIY Wedding Day Accessories - The Knot Blog
Pingback: Make These 6 DIY Wedding Day Accessories | Weddings In Rhode Island
Pingback: Make These 6 DIY Wedding Day Accessories - DIY Ideas & Budget Weddings | The Knot
Was there anything special you did to keep the ribbon from fraying once cut?
LikeLike
Nope, I just used very sharp scissors to make a clean cut.
LikeLike
I read that ballet dancers apply clear nail polish to the edge of their pointe shoe ribbons to prevent those ribbons from fraying.
LikeLike
Pingback: DIY Bridal Sash for Less than $20 | The Budget Savvy Bride
Pingback: DIY Bridal Sash For Less Than $20 | crazyforus
hi congrats! beautiful job! how did you apply the sash? did you also glue it on to dress?
LikeLike
Forgot one more question how many appliques did you use?
LikeLike
Thanks! I used just one applique (it’s a rather large one). I used E6000 glue to attach the applique to the ribbon, and I just tied the ribbon around my waist…no gluing it to my gown. Hope that clears things up for you.
LikeLike
Pingback: Getting Married? Check Out These Awesome DIY Wedding Day Accessories | Modera Westshore
Pingback: The Craft Queen | 74. Published on Yahoo! (plus, response to snarky comments)
Pingback: 15 Awesome DIY Wedding Belts & Sashes Ideas - Paris Ciel (EN)
Thank you so much for your tutorial. I just got my wedding dress today and the belts they put on me was at a crazy price…we decided to make one to and your tutorial confirmed what we were thinking on how to do it…I am also a dIY bride! Thanks again
LikeLike
No problem, glad this helped you out!
LikeLike
Reblogged this on Muskoka Weddings and commented:
I just bought a sash and an applique so I’m definitely going to try this instead of sewing it on which I was worried about because of puckering.
LikeLike